197
197
The process to automatically match the widths of lines and radius of points is invoked by creating extensions that use the special extension variable names “TraceLineWidth” & TracePointRadius”
Click on the links below for information on:
Special Extension Variable Names
26 - Create / Edit Extensions (Premier)
eTakeoff Dimension has example traces of Line and Count scaling under the Concrete folder of the trace list.
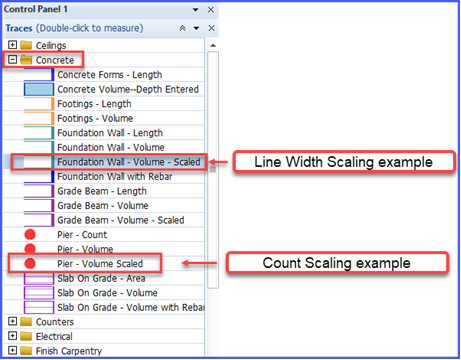
Line Width Scaling
To demonstrate how the line width scale trace works, see steps below.
- Open the LaQuinta project and navigate to Drawing “063 S.1 FOUNDATION PLAN”
- Double click on the “Foundation Wall – Volume – Scaled” trace
- Click several points of the foundation wall as shown below.
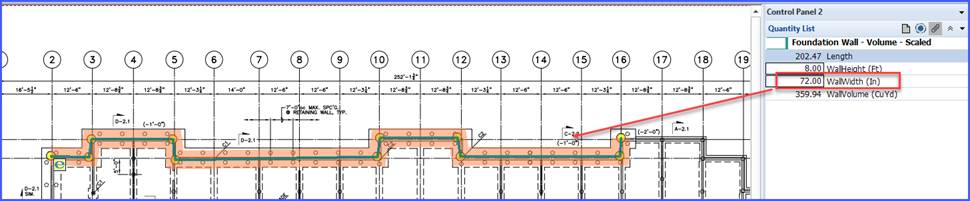
- Enter “72” for the WallWidth in the Quantity List control.
- Notice how the measurement has a green line to display the length and an orange filled width that represents the width of the wall.
The scaling is invoked by a special extension variable, “TraceLineWidth” in the extension that is assigned to the trace.
To determine which extension is assigned to the trace,
- Click on the measurement to select it
- Right click and select “Edit Trace”
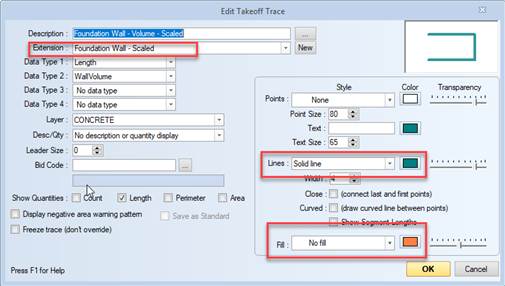
- Click on the Settings Tab / Edit Extensions
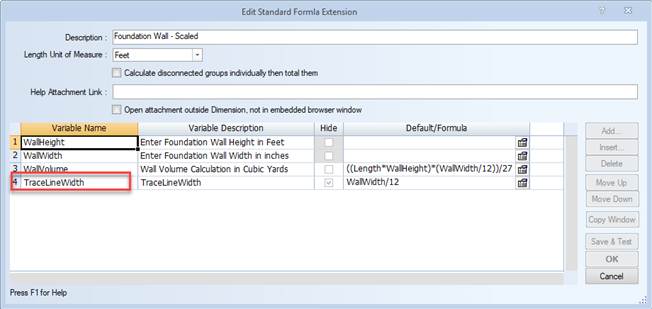
- Scroll down to the extension, “Foundation Wall – Scaled” & double click on the extension to open it
- See TraceLineWidth variable below in the extension
Count Scaling
To demonstrate how the Count scale trace works, see steps below.
- Open the LaQuinta project and navigate to Drawing “063 S.1 FOUNDATION PLAN”
- Double click on the “Pier – Volume Scaled” trace
- Click several points of the foundation wall as shown below.
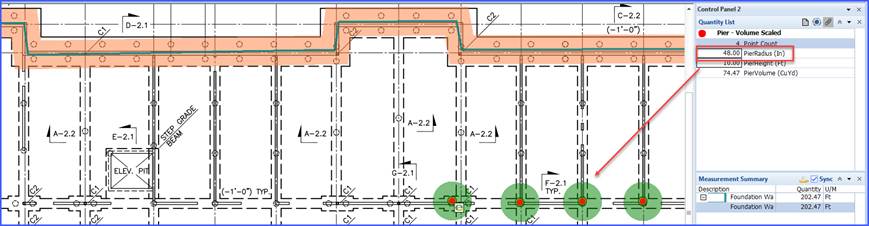
- Enter “48” for the PierRadius (In) in the Quantity List control.
- Notice how the measurement has a red dot to display the count of the piers and a green filled width that represents the radius of the pier.
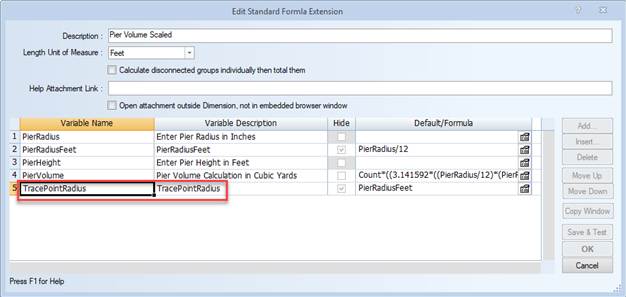
The scaling is invoked by a special extension variable, “TracePointRadius” in the extension that is assigned to the trace.
To determine which extension is assigned to the trace,
- Click on the measurement to select it
- Right click and select “Edit Trace”
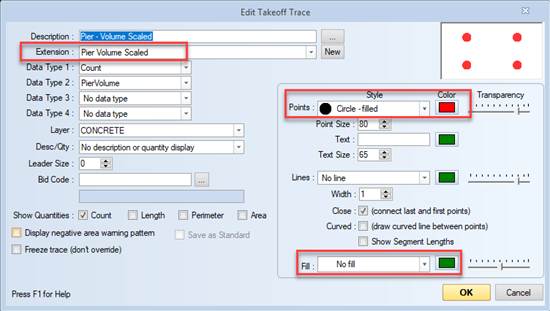
- Click on the Settings Tab / Edit Extensions
- Scroll down to the extension, “Pier Volume Scaled” & double click on the extension to open it
- See TracePointRadius variable below in the extension